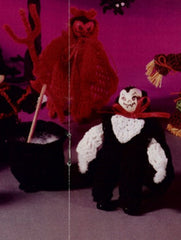
Halloween Devil - Free Crochet Pattern
Click the banners below for more popular fall patterns, available via download!

Halloween Devil
FP304
Easy Skill
Size:About 4" tall.
Materials:Crochet Cotton Thread Size 10 - Red
(60 yds); Large Needle; Craft Glue, ⅛" Red Satin Ribbon 6" long, 3 Red Pipe Cleaners; ¾" Wood Bead, Black & Red Markers or paint (for face on bead).
Crochet Hook:Steel crochet hook # 7
Gauge: 8 dc = 1 inch.
Abbreviations
JOINING WITH SC
When instructed to join with sc, begin with sl knot on hook, insert hook in st or sp indicated, yo and pull up a loop, yo and draw through both loops on hook.
DEVIL SUIT
Rnd 1:With Red, ch 4, sl st in first ch to form ring; ch 3 (counts as first dc now and throughout), 15 dc in ring; join with sl st to first dc. (16 dc)
DO NOT TURN EACH ROUND.
Rnd 2:Ch 3, dc in same st as joining, (2 dc in next dc) around; join. (32 dc)
Rnd 3:Ch 3, increasing 12 dc evenly spaced, dc in each dc around; join. (44 dc)
Rnd 4:Ch 3, dc in next 5 dc, skip next 10 dc (for arm), dc in next 12 dc, skip next 10 dc (for arm), dc in next 6 dc; join. (24 dc)
Rnd 5:Ch 3, (dc in next dc) around; join. (24dc)
Rnd 6:(Leg)Ch 3, dc in next 11 dc, mark next st; join. (12 dc) Leave remaining sts unworked.
Rnds 7-9:Ch 3, (dc in next dc) around; join.
Rnd 10:Ch 3, 2 dc in next dc, (dc in next dc, 2 dc in next dc) around; join. (18 dc) Finish off and weave in ends.
Other Leg
Rnd 6:Join R in marked st of Leg Rnd 5, ch 3, dc in next 11 dc; join. (12 dc)
Rnds 7-10:Rep Rnds 7-10 of Suit. Finish off and weave in ends.
Sleeves
Rnd 1:Working in unused sts of Rnd 3, join Red in any dc, ch 3, work 11 dc around armhole opening; join with sl st to first dc. (12 dc)
Rnd 2:Ch 3, (dc in next dc) around; join.
Rnd 3:Ch 3, 2dc in next st, (dc in next dc, 2 dc in next dc) around; join. (18 dc) Finish off and weave in ends.
CAPE
Row 1:With R, ch 16, 2 dc in 4th ch from hook (skipped ch counts as first dc), (dc in next ch) across to last ch, 2 dc in last ch. (16 dc)
Rows 2-10:Ch 3, turn, 2 dc in next dc, (dc in next dc) across to last dc, 2 dc in last dc.
At the end of Row 10, there are 34 dc. DO NOT FINISH OFF.
Edging and Collar
Row 1:Ch 1, do not turn, working in sides of rows, sc evenly across to starting ch, working in opposite side of starting ch, ch 3, (skip next ch, hdc in next ch) across.
Row 2:Ch 3, turn, 4 dc in first ch-1 sp, (2 dc in next ch-1 sp) across to last ch-1 sp, 5 dc in last ch-1 sp.
Row 3:Ch 3, turn, 2 dc in next dc, (dc in next dc) across to last dc, 2 dc in last dc, ch 1, working in sides of rows, evenly sc along other side of Cape. Finish off and weave in ends.
TAIL
Row 1:Using double strand of Red, ch 3, hdc in 3rd ch from hook.
Rows 2-3:Ch 2, turn, 2 hdc in next hdc, (hdc in next hdc) across to last hdc, 2 hdc in last hdc.
At end of Row 3, ch 1, turn, sl st in next 3 hdc, ch 12. Finish off leaving long end.
- Using long end, sew tail to center back of Suit.
Attaching Head:
With Red Marker or paint, color Wood Bead completely red. Having bead holes at center top and center bottom, with Black draw devil face and hair.
Fold one Pipecleaner in half. Make 2 horns at fold. Insert 2 free ends of cleaner through Head Bead from top to bottom. Feed 2 ends of cleaner through top of Suit Rnd 1, putting an end down through each leg. Cut ends 1" past end of Leg. Fold ends forward for feet.
Arms:
Fold end of another Pipecleaner over 1" at end. Feed this end through one Sleeve end and out the other. Cut Pipecleaner 1" past edge of Sleeve. Fold end back for other hand.
Pitchfork:
Cut a 4½" piece of Pipecleaner. Cut a 3" piece. Wrap center of 3" piece 1" down from end of longer piece.
Finishing
Weave in all ends.
Twist right hand around pitchfork.
Weave Ribbon through eyelet row at neck edge of Cape. Tie at center front of Suit.


